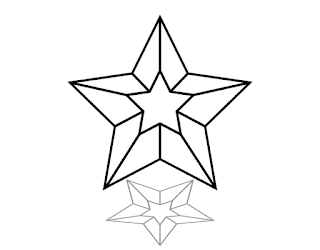
Introduction:
3D star Drawing can add a captivating dimension to your artwork, making it pop off the page with depth and brilliance. Whether you're an aspiring artist or a seasoned illustrator, mastering the techniques to create a 3D star can unlock a world of creativity and visual impact. In this step-by-step guide, we'll explore how to draw a stunning 3D star from start to finish, allowing you to elevate your drawings to celestial heights.
Visit the 3D optical illusion drawings.
Step 1: Gather Your Materials
Before embarking on your 3D star drawing journey, gather the necessary materials:
Paper: A sketchpad or drawing paper with a smooth surface works best.
Pencils: A range of graphite pencils (e.g., 2H, HB, 2B) for sketching and shading.
Eraser: A kneaded eraser or vinyl eraser for making corrections and refining details.
Ruler: A straight edge for creating precise lines and angles.
Optional: Colored pencils or markers for adding color and depth to your star.
Note: After learning this tutorial visit more 3D drawing ideas easy.
Step 2: Start with a Base Triangle
Begin by sketching a base triangle on your paper using a pencil. This triangle will serve as the foundation for your 3D star. You can use a ruler to ensure that your lines are straight and your angles are consistent. Experiment with different sizes and proportions to achieve the desired shape for your star.
Step 3: Create the Front Edges
Next, draw two diagonal lines extending from the top corners of the base triangle towards the center. These lines will represent the front edges of your 3D star. Make sure the lines are parallel and converge at a point near the top of the triangle, giving the illusion of depth.
Step 4: Form the Back Edges
Draw two shorter diagonal lines extending from the bottom corners of the base triangle towards the center, mirroring the front edges. These lines will serve as the back edges of your 3D star, completing the illusion of depth. Ensure that the back edges are parallel to the front edges and converge at the same point near the top of the triangle.
Step 5: Connect the Edges
With the front and back edges in place, connect them to form the sides of your 3D star. Draw straight lines connecting the corresponding ends of the front and back edges, creating a three-dimensional shape. Take your time to ensure that the lines are smooth and the angles are consistent for a polished finish.
Step 6: Add Dimension and Detail
Now it's time to add dimension and detail to your 3D star drawing. Shade the sides of the star using varying pressure on your pencil to create gradients of light and shadow. Pay attention to the direction of light and shade accordingly to enhance the 3D effect. You can also add additional lines and details to embellish your star and make it stand out.
Step 7: Final Touches
Step back and evaluate your 3D star drawing. Make any necessary adjustments or refinements to ensure that it meets your vision. Erase any stray lines or smudges and add final touches to enhance the overall appearance. Consider adding color to your star using colored pencils or markers to make it even more vibrant and eye-catching.
Conclusion:
Drawing a 3D star is a rewarding artistic endeavor that allows you to explore concepts of depth, perspective, and dimension. By following this step-by-step guide and experimenting with different techniques, you can create a stunning 3D star drawing that captivates viewers and adds a touch of celestial beauty to your artwork. So grab your pencils and let your imagination soar as you bring your 3D star to life on paper.


